

There’s something magical about the aroma of freshly roasted coffee beans wafting through your home. I still remember the first time I roasted my own beans that distinct moment when the kitchen filled with a scent more intoxicating than any candle or bakery could ever produce. If you’ve ever wondered about roasting your own coffee at home but thought it required expensive equipment, I’ve got news for you: your regular oven can do the trick beautifully.
Home coffee roasting isn’t just for coffee snobs or professionals. It’s a rewarding craft that can transform your morning brew while saving you money in the long run. Plus, there’s an undeniable satisfaction in serving guests coffee that you’ve roasted yourself.
In this guide, I’ll walk you through everything you need to know about roasting coffee beans in your home oven from selecting the right beans to achieving the perfect roast profile. Whether you’re a curious beginner or looking to refine your technique, this comprehensive approach will help you unlock flavors you never knew existed in your daily cup.
Insert image of raw and roasted coffee beans side by side here
Table of Contents
Why Roast Your Own Coffee Beans?
Before diving into the how-to, let’s talk about why you might want to roast your own coffee in the first place:

I used to spend $15-20 on a 12oz bag of specialty coffee that would be past its prime within two weeks. Now, I buy green beans in bulk for about $6-7 per pound and roast small batches weekly. The difference in flavor—and in my wallet—has been remarkable.
What Equipment Do I Need to Roast Coffee Beans in an Oven?
The beauty of oven roasting is its simplicity. You likely have most of what you need already, though a few specialized items can improve your results. Here’s your equipment checklist:
Essential Equipment:
- Baking sheet with a rim (preferably a heavy-duty one)
- Colander or sieve (for cooling beans quickly)
- Oven mitts
- Timer/stopwatch
- Metal whisk or wooden spoon for stirring
- Storage containers for roasted beans (airtight)
Recommended Additional Equipment:
- Perforated baking sheet or mesh roasting basket (improves airflow)
- Thermometer (preferably an instant-read digital type)
- Scale (for consistency between batches)
- Heat-resistant gloves
- Fan (for quick cooling)
I started with just the essentials, and while I’ve gradually added more specialized equipment to my collection, you can achieve excellent results with basic kitchen tools. The key is understanding the process more than having fancy gear.
Selecting the Right Beans for Home Roasting
Not all coffee beans roast the same way. Here’s what to look for when sourcing green coffee beans:
Bean Origin and Variety
Different regions produce beans with distinct flavor profiles:
- Central/South American beans (Guatemala, Colombia, Brazil): Often well-balanced with chocolate and nut notes; forgiving for beginners
- African beans (Ethiopia, Kenya): More complex with fruity, floral notes; may require more careful roasting
- Asian beans (Sumatra, Java): Earthy, full-bodied characteristics; can handle darker roasts well
For your first few attempts, I’d recommend starting with beans from Brazil or Colombia. They’re more forgiving for beginners and still produce a delicious cup.
Bean Size and Density
- Larger beans typically need more time to roast evenly
- Higher altitude grows produce denser beans that may require more heat
- Screen size (the measurement of bean size) matters for consistent roasting
Where to Buy Green Coffee Beans
Look for suppliers that provide detailed information about their beans and offer smaller quantities for beginners:
- Specialty coffee shops
- Online retailers specializing in green coffee
- Local roasters who might sell green beans
When I started, I ordered a sampler pack that included four different origins (1 pound each). This allowed me to experiment without committing to a large quantity of any single bean.
How Do You Roast Coffee Beans in an Oven?
Now for the main event! Here’s my step-by-step process for roasting coffee beans in a home oven:
Step 1: Preparation
- Preheat your oven to 500°F (260°C). This temperature may seem high, but we’ll adjust it during the process.
- Prepare your workspace by setting up your cooling station: place a colander over a bowl or in the sink, and have a fan ready if you’re using one.
- Measure your green beans – I recommend starting with 8 ounces (227g) for a standard baking sheet. This allows enough space for the beans to move around.
- Examine the beans and remove any debris, stones, or damaged beans.
Step 2: The Roasting Process
- Spread the beans in a single layer on your baking sheet. If using a perforated sheet or mesh basket, place it on top of a regular baking sheet to catch any chaff.
- Place the beans in the preheated oven and immediately reduce temperature to 450°F (232°C).
- Set your timer for 15 minutes, but be prepared to adjust based on your observations.
- Every 3-4 minutes, quickly remove the tray and stir the beans to ensure even roasting. Work fast to minimize heat loss.
- Watch for color changes and listen for the “first crack” – a popping sound similar to popcorn that indicates the beans are reaching a light roast stage.
Step 3: Monitoring the Roast
As the beans roast, they’ll go through several stages, each with distinct characteristics:
- Drying phase (0-5 minutes): Beans turn from green to yellow
- First crack (around 7-9 minutes): Beans expand, making audible popping sounds
- Development phase (9-13 minutes): Beans darken quickly, developing flavors
- Second crack (13+ minutes): Quieter, more frequent cracking indicates dark roast territory
The Development time between first crack and the end of your roast is crucial for flavor development. For most beans, aim for 2-4 minutes of development after first crack for a medium roast.
Step 4: Determining When to Stop
The art of coffee roasting lies in knowing when to stop the process. Here’s a simple guide to roast levels:
| Roast Level | Color | Approximate Time | Sound Markers | Flavor Profile |
|---|---|---|---|---|
| Light | Cinnamon/tan | 8-10 minutes | Just after first crack | Bright, acidic, fruity/floral notes |
| Medium | Medium brown | 10-13 minutes | After first crack ends | Balanced, sweet, mild acidity |
| Medium-dark | Dark brown | 13-15 minutes | Beginning of second crack | Rich, bittersweet, reduced acidity |
| Dark | Very dark brown | 15+ minutes | During second crack | Bold, smoky, bitter notes |
Each level brings out different characteristics in the bean. I personally find that most beans reach their sweet spot just after first crack ends, but before second crack begins.
Step 5: Cooling the Beans
Cooling is crucial—the beans will continue to roast from residual heat if not cooled quickly:
- Immediately transfer hot beans to your prepared colander.
- Gently shake and stir to allow heat to dissipate and chaff to fall away.
- Direct a fan at the beans if available for faster cooling.
- Continue stirring until beans reach room temperature (about 5 minutes).
Step 6: Resting the Beans
Unlike commercially roasted coffee, freshly roasted beans aren’t ready for brewing immediately:
- Transfer cooled beans to a container that allows CO2 release but prevents air entry. Mason jars with the lid slightly loose work well.
- Allow beans to rest for 12-24 hours to de-gas and develop flavor.
- After the rest period, transfer to an airtight container for storage.
Most coffees reach their peak flavor 2-7 days after roasting, depending on the bean and roast level.
What is the Ideal Oven Temperature for Roasting Coffee Beans?
Temperature control is one of the trickiest aspects of oven roasting. After experimenting with different approaches, I’ve found that a declining temperature profile works best:
- Start: 500°F (260°C) for preheating
- Initial roasting: 450°F (232°C) for the first 5 minutes
- Mid-roast: 425°F (218°C) until first crack
- Development: 400°F (204°C) post-first crack
This gradual reduction mimics professional roasting curves and helps prevent scorching. The ideal temperature can vary based on your specific oven and bean selection.
For those with convection ovens, reduce these temperatures by about 25°F, as the circulating air increases heat transfer efficiency.
How Long Does It Take to Roast Coffee Beans in an Oven?
The total roasting time typically ranges from 12-20 minutes, depending on:
- Your desired roast level
- The type of beans you’re using
- Your oven’s characteristics
- Batch size
A good roast isn’t determined by time alone but by development—the beans should progress through their stages without rushing or stalling.
For my setup, I’ve found these approximate timings work well:
- Light roast: 12-14 minutes
- Medium roast: 14-16 minutes
- Dark roast: 16-18 minutes
Remember, visual cues and sounds are more important than strictly following a timer. Learn to recognize the appearance of beans at your preferred roast level.
How Do You Ensure Even Roasting in an Oven?
Achieving even roasting is perhaps the biggest challenge with the oven method. Here are my tried-and-true techniques:
1. Proper Bean Distribution
- Single layer only – avoid overcrowding
- Use the middle rack for most even heat distribution
- Rotate the tray 180 degrees halfway through roasting
2. Regular Stirring
- Stir every 3-4 minutes
- Use quick, thorough motions to redistribute beans
- Ensure beans from the edges move to the center and vice versa
3. Equipment Modifications
- A perforated roasting tray or mesh basket improves airflow
- Some home roasters create DIY “drums” that can be rotated in the oven
- A baking stone placed on the rack below can help stabilize temperatures
4. Oven Calibration
- Use an oven thermometer to verify actual temperatures
- Note any hot spots in your oven and adjust accordingly
- Consider leaving the oven door cracked for better air circulation
Understanding your particular oven’s quirks is key to consistent results.
Troubleshooting Common Oven Roasting Issues
Even with the best techniques, you might encounter some challenges:
Uneven Roasting
Problem: Some beans are darker than others.
Solution: Increase stirring frequency and ensure thorough mixing. Consider reducing batch size.
Scorched Beans
Problem: Beans have burn marks despite not reaching desired roast level.
Solution: Lower initial temperature and use a heavier baking sheet for better heat distribution.
Underdeveloped Flavor
Problem: Coffee tastes grassy or has cereal-like flavors.
Solution: Extend development time after first crack before cooling.
Baked Flavor
Problem: Coffee tastes flat, like cardboard.
Solution: Your temperature may be too low or declining too gradually. Try maintaining higher heat through first crack.
Excessive Smoke
Problem: Roasting creates too much smoke in the kitchen.
Solution: Ensure good ventilation, reduce batch size, or consider roasting at a slightly lower temperature.
Taking Your Coffee Roasting to the Next Level
Once you’ve mastered the basics, try these advanced techniques:
1. Roast Profiling
Start keeping detailed notes about each roast, including:
- Starting temperature
- Temperature adjustments
- Time to first crack
- Development time
- Total roast time
- Cupping score and flavor notes
This data will help you refine your approach for specific beans.
2. Blending
Create your own signature blends by combining different bean origins or roast levels. Some guidelines:
- Blend after roasting, not before
- Start with 2-3 complementary origins
- Experiment with different proportions
- Allow blended beans to marry for 24-48 hours before brewing
3. Try Different Brewing Methods
Different roast levels shine with different brewing methods:
- Light roasts: Pour-over, Chemex, or AeroPress
- Medium roasts: Versatile—works with most methods
- Dark roasts: French press, espresso, or moka pot
4. Consider Dedicated Equipment
If you find yourself enjoying the process, consider investing in dedicated coffee roasting equipment:
- Popcorn poppers (an affordable step up from oven roasting)
- Home coffee roasters (ranging from $200-1,000)
- Sample roasters (for small, precise batches)
Storing Your Freshly Roasted Coffee
Proper storage preserves all your hard work:
- Use valve bags or airtight containers – Mason jars work well
- Keep away from light – Use opaque containers or store in a dark cabinet
- Avoid heat – Store at room temperature, away from appliances
- Don’t refrigerate or freeze unless properly sealed to prevent moisture
- Use within 2-3 weeks for optimal flavor
Insert image of properly stored coffee beans here
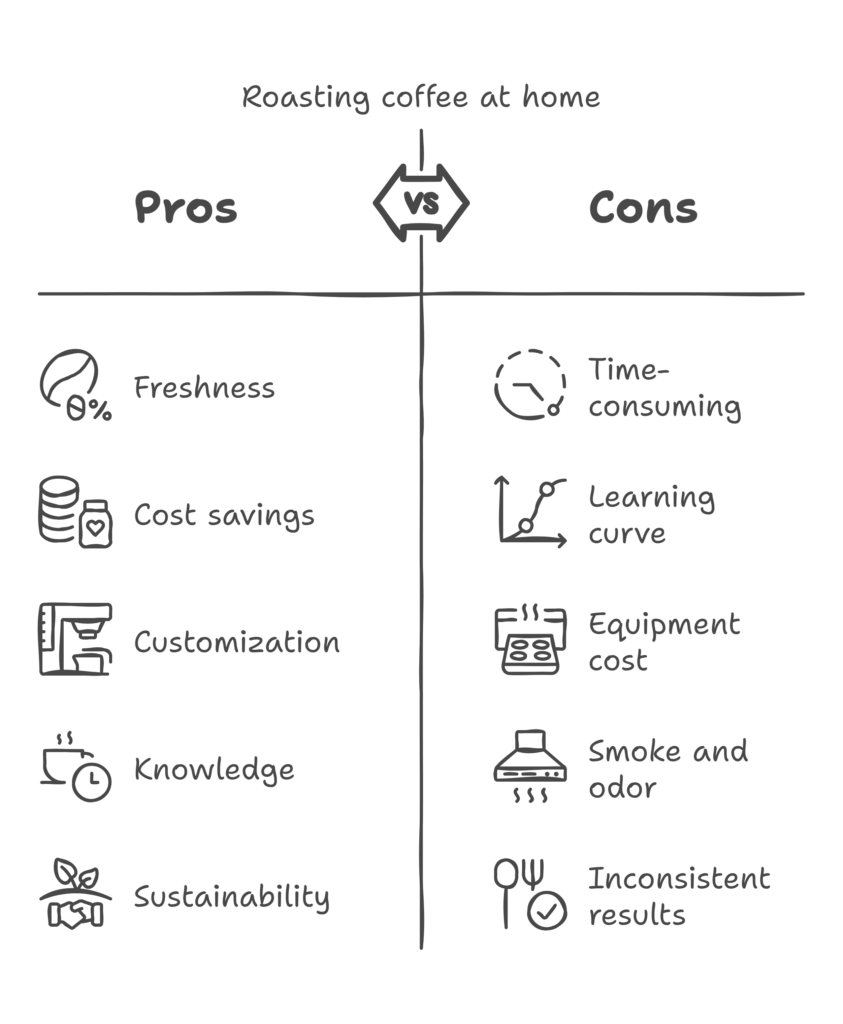
Is Oven Roasting Right for You?
Let’s be honest oven roasting isn’t for everyone. Here’s a quick pros and cons list to help you decide:
Pros:
- Uses equipment you already own
- Minimal startup cost
- Can roast decent quantities at once
- Good introduction to roasting basics
Cons:
- Less precise temperature control
- Requires constant attention
- Can be smoky
- Results may be less consistent
If you enjoy hands-on cooking projects and appreciate understanding the “why” behind your food and beverages, coffee roasting will likely be a rewarding hobby. As with any craft, there’s always more to learn, and that’s part of the joy.
Conclusion: Your Journey to Better Coffee Starts Here
Roasting coffee at home with your oven isn’t just about saving money or even getting the freshest possible cup though those are wonderful benefits. It’s about connecting with a centuries-old craft and understanding how heat, time, and bean chemistry combine to create the complex flavors we love in coffee.
I started my home roasting journey thinking it would be a one-time experiment. Three years later, I can’t imagine returning to store-bought beans. There’s something deeply satisfying about serving friends a cup of coffee and saying, “I roasted this myself.”
Whether you’re looking to dip your toe in the water with a single batch or planning to make home roasting part of your weekly routine, the method outlined above will give you a solid foundation. Remember that perfect roasting, like perfect coffee, is subjective ultimately, the best roast is the one you enjoy drinking.
So heat up that oven, grab some green beans, and embark on your coffee roasting adventure. Your future cups will thank you.
Ready to try roasting your own beans? Share your results or questions in the comments below!