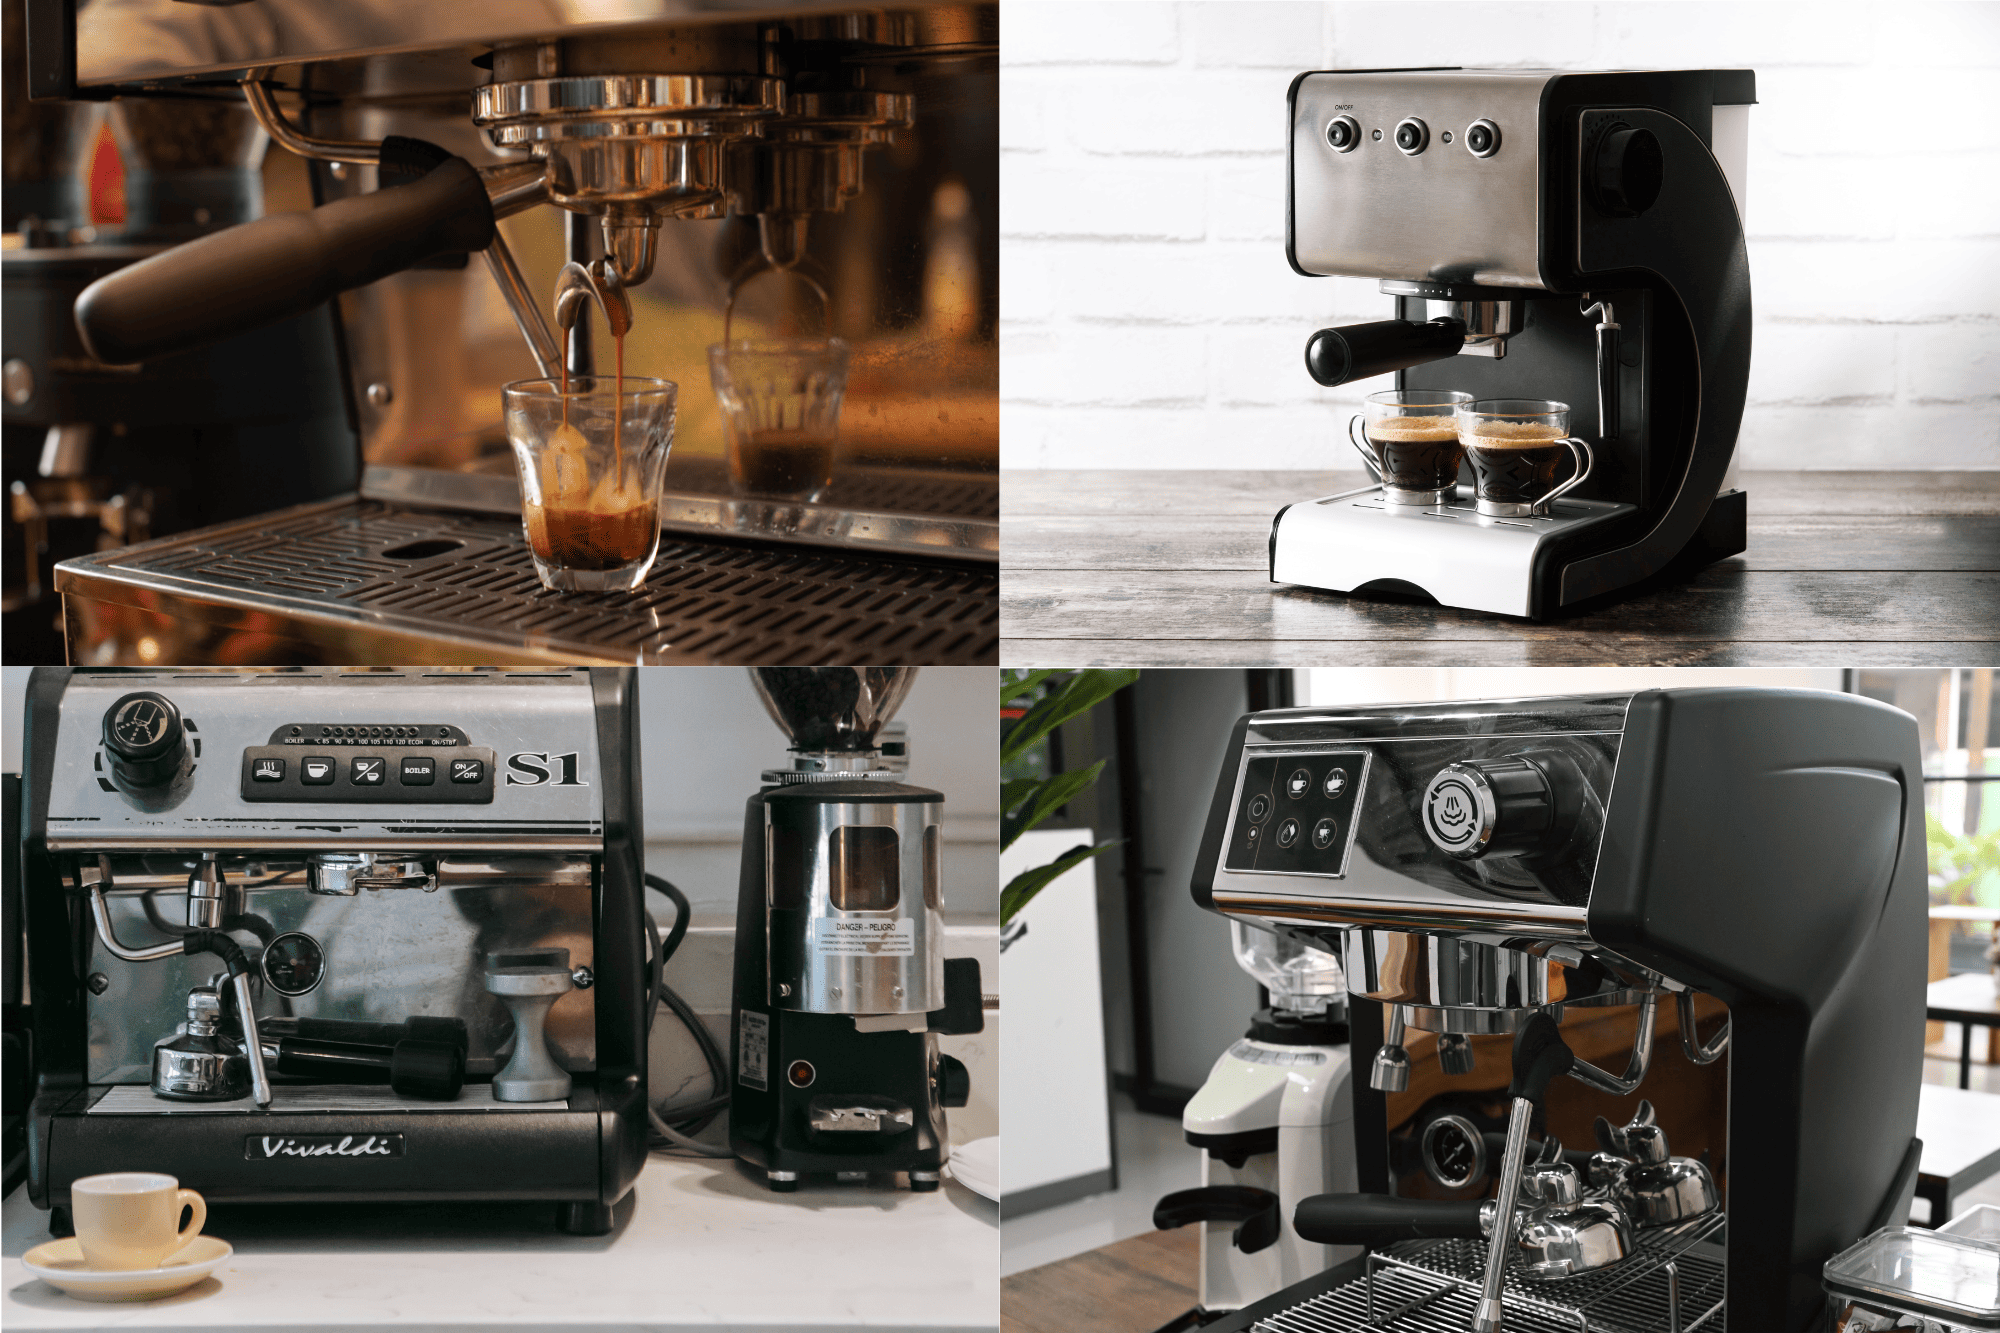
The first time I pulled a perfect shot of espresso at home, I felt like I’d unlocked a superpower. That rich, caramel-colored crema sitting atop a velvety shot of espresso made by my own hands, in my own kitchen! It was a small victory, but one that turned my morning routine from mundane to magical.
If you’re reading this, chances are you’re contemplating that same journey from casual coffee drinker to home barista. And honestly? It’s one of the best decisions I’ve made for my daily ritual (and my wallet, considering my previous $5 a day café habit).
The good news? You don’t need to drop a thousand dollars to get started. The market for espresso machines under $500 has exploded in recent years, with manufacturers delivering impressive technology at increasingly accessible price points. These entry-level machines offer the perfect balance of quality, functionality, and affordability for beginners.
In this guide, I’ll walk you through everything you need to know to find your perfect starter espresso machine. We’ll explore what features actually matter, which machines deliver the best bang for your buck, and how to navigate the learning curve that comes with entering the wonderful world of home espresso.
Let’s transform your kitchen counter into your new favorite coffee shop!
Table of Contents
What Features Should Beginners Look for in an Espresso Machine Under $500?
When I bought my first espresso machine, I was overwhelmed by technical jargon and features I didn’t understand. Let me save you that headache by breaking down what actually matters for beginners:
Pressure System
The gold standard for espresso is 9 bars of pressure. While professional machines can go up to 15 bars, anything between 9-15 bars will create that perfect extraction for rich espresso.
Type of Machine
In the under $500 range, you’ll encounter three main types:
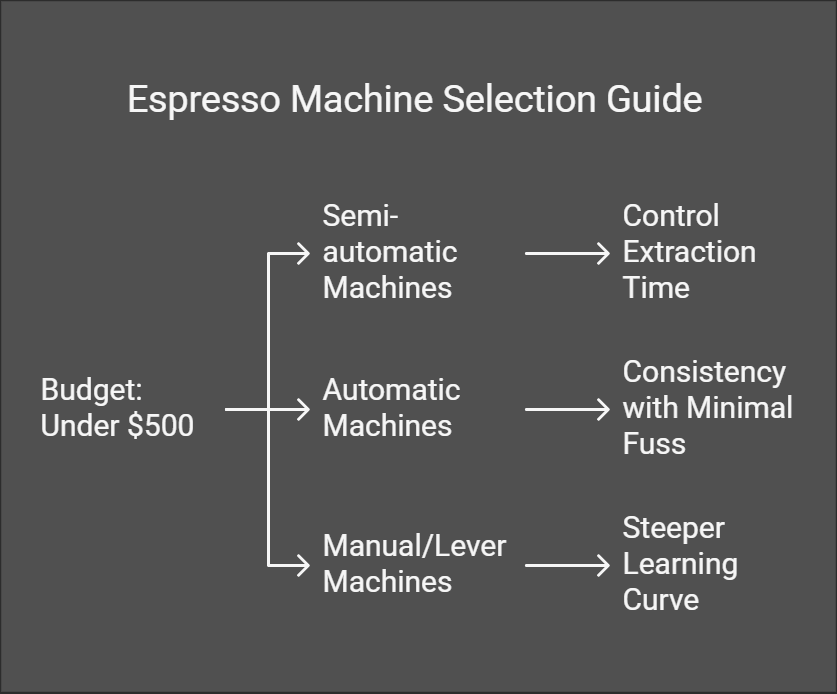
- Semi-automatic machines: These give you control over the extraction time but automate the pressure. Perfect for beginners who want to learn the craft while having some guardrails.
- Automatic machines: These handle the timing and pressure for you. Great if you want consistency with minimal fuss.
- Manual/lever machines: These require you to create the pressure yourself. They’re less common in this price range and have a steeper learning curve.
For most beginners, I recommend starting with a semi-automatic machine. It strikes the perfect balance between learning the craft and producing reliable results.
Boiler Type
- Single boiler: One heating system for both brewing espresso and steaming milk. You’ll need to wait between these functions.
- Dual boiler: Separate heating systems allow simultaneous brewing and steaming. Rare in this price range but worth noting.
- Thermoblock: Heats water on demand rather than storing it. Often more affordable and heats quickly.
For under $500, you’ll mostly find single boiler and thermoblock systems. Both work well for beginners, but thermoblock systems tend to heat up faster—perfect if you’re impatient like me!
Milk Frothing Capability
Unless you exclusively drink straight espresso, you’ll want a machine with milk frothing capability:
- Steam wand: Gives you control over milk texture but requires practice.
- Automatic frother: Creates foam with the push of a button—less artisanal but more consistent for beginners.
I’d suggest prioritizing a machine with a decent steam wand if you’re interested in learning latte art. It’s a steeper learning curve but more rewarding long-term.
Grinder Consideration
While not strictly part of the machine, the grinder question is crucial. Some machines come with built-in grinders (these are called “super-automatic” machines), while others require a separate purchase.
Note: We’ll dive deeper into the grinder question later in this article.
Build Quality and Durability
Even at this price point, look for:
- Machines with metal components rather than all plastic
- Brands with good warranty coverage (1-2 years minimum)
- Replaceable parts for maintenance
A quality machine in this range should last you 3-5 years with proper care.
Can I Make Café-Quality Espresso with a Machine Under $500?
The short answer? Yes, with some caveats.
The longer answer requires some honesty about expectations. A $500 machine won’t match the consistency or versatility of the $5,000 La Marzocco at your local specialty café. But with the right technique, fresh beans, and a decent grinder, you can absolutely pull shots that rival (and sometimes exceed) what you’d get at a chain coffee shop.
Here’s where machines in this price range excel:
- Making excellent everyday espresso for personal consumption
- Learning the fundamentals of extraction and milk steaming
- Producing consistent results once you dial in your technique
And where they might fall short:
- Making back-to-back drinks for large groups
- Maintaining perfect temperature stability for multiple consecutive shots
- Providing the pressure control that coffee competitions require
As coffee expert James Hoffmann notes in one of his reviews, “The limitations aren’t about flavor but about convenience and consistency.” I think that perfectly captures the reality.
For my own journey, I was genuinely surprised by what my first machine could produce once I learned its quirks. Sure, my initial attempts were sour or bitter disasters, but within weeks I was making lattes that impressed even my coffee-snob friends.
Top 5 Best Espresso Machines Under $500 for Beginners
After researching dozens of models and consulting expert reviews from Serious Eats and Wirecutter, here are my top recommendations for beginners:
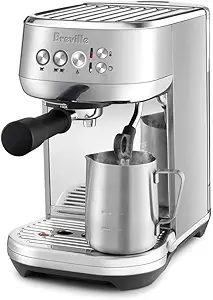
1. Breville Bambino Plus – $499
Why it’s great for beginners: Combines simplicity with impressive technology, including automatic milk texturing and a fast 3-second heat-up time.
The Bambino Plus is like that friendly teacher who holds your hand while you’re learning but also treats you like you’re capable of great things. It’s compact but mighty, with programmable shot volumes and a surprisingly powerful steam wand.
Key features:
- PID temperature control for consistent extraction
- Automatic milk texturing with adjustable temperature
- 54mm portafilter (professional size)
- 3-second heat-up time
Potential drawbacks:
- No built-in grinder (you’ll need to purchase separately)
- Small drip tray that needs frequent emptying
According to Craft Coffee Spot, “The Bambino Plus delivers performance that punches well above its price point, making it ideal for serious beginners.”
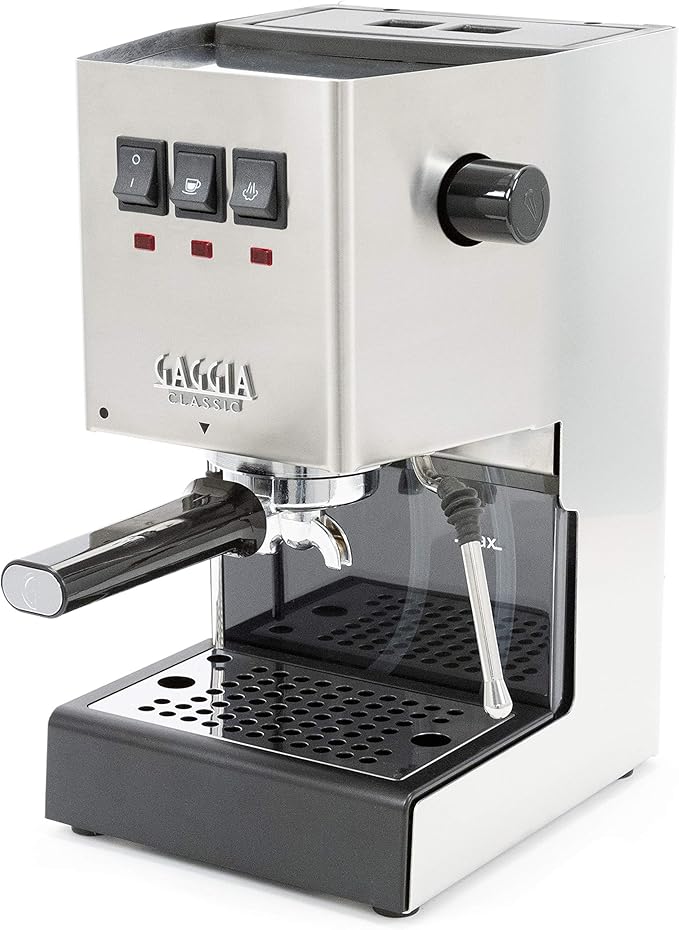
2. Gaggia Classic Pro – $449
Why it’s great for beginners: Commercial-quality components in a home-friendly package with exceptional longevity and repairability.
The Gaggia Classic Pro is the reliable Toyota of espresso machines—not the flashiest option, but it’ll keep running for years with proper maintenance. It’s been a staple recommendation for beginners for decades.
Key features:
- Commercial 58mm portafilter
- Solenoid valve (reduces mess and improves shot quality)
- Durable brass components
- Strong steam performance
Potential drawbacks:
- Steeper learning curve than more automated options
- Takes longer to heat up (about 5 minutes)
Tom’s Guide calls it “the gold standard for entry-level espresso machines,” noting its exceptional build quality compared to competitors.
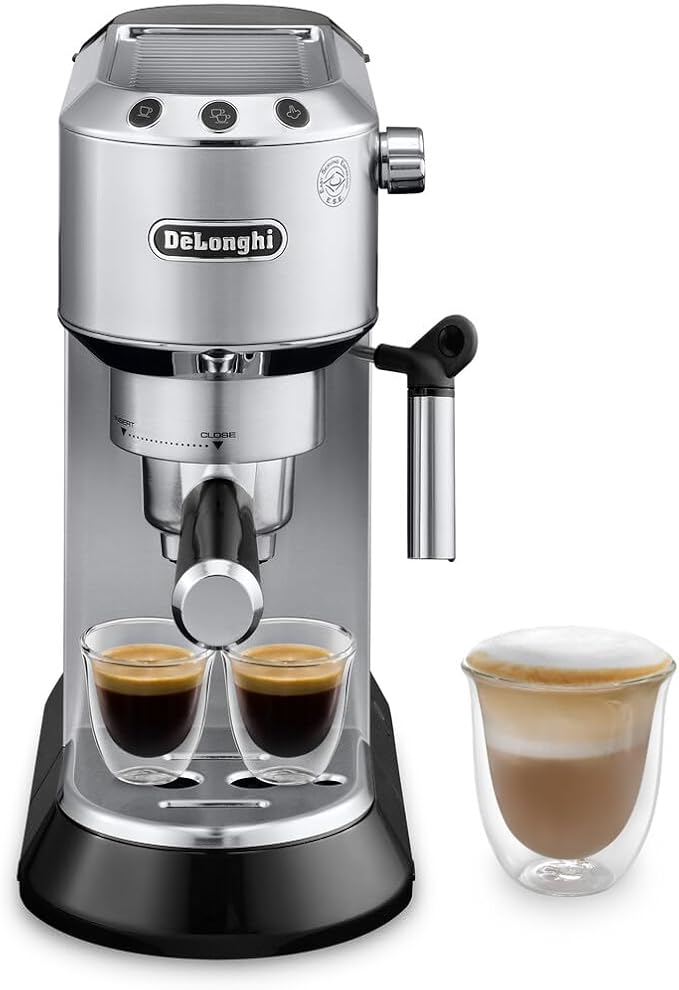
3. De’Longhi Dedica EC680M – $349
Why it’s great for beginners: Ultra-compact design that doesn’t sacrifice functionality, perfect for small kitchens.
If counter space is at a premium in your kitchen (I feel you, apartment dwellers!), the Dedica delivers impressive performance in a footprint barely wider than a book.
Key features:
- Just 6 inches wide
- 15-bar pump pressure
- Adjustable automatic flow stop
- Manual frother for cappuccinos and lattes
Potential drawbacks:
- Smaller portafilter means less room for error
- Some plastic components may affect longevity
According to Coffee Blog UK, “It’s remarkably capable given its tiny footprint, making it ideal for those with limited counter space.”
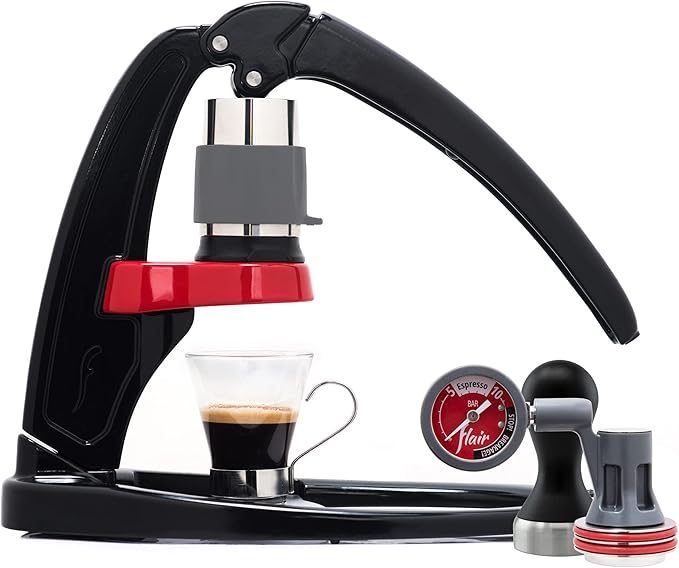
4. Flair Pro 2 Manual Espresso Press – $339
Why it’s great for beginners: Teaches you the fundamentals of pressure and extraction without electrical components to fail.
The Flair is for the hands-on learner who wants to understand every variable in the espresso-making process. It’s also surprisingly portable—I’ve taken mine camping!
Key features:
- Complete manual control over pressure profile
- No electricity required
- Stainless steel construction
- Produces professional-quality shots with proper technique
Potential drawbacks:
- No milk steaming capability (you’ll need a separate frother)
- Requires more time and attention per shot
- Steeper learning curve
Coffeeness notes: “For those willing to learn, the Flair can produce shots that rival machines costing five times as much.”
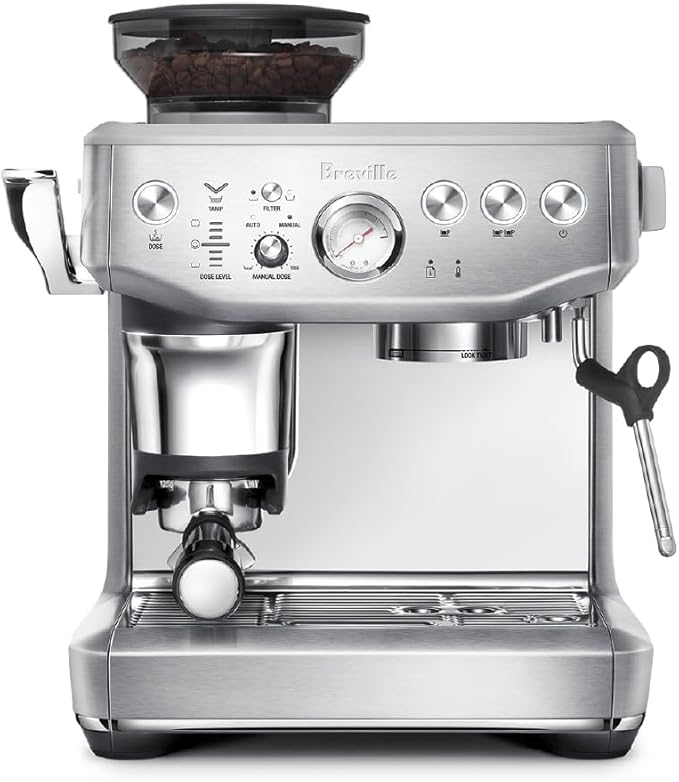
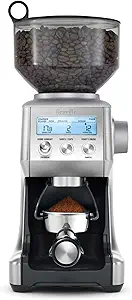
5. Breville Barista Express Impress – $499 (often on sale)
Why it’s great for beginners: All-in-one solution with built-in grinder that actively guides your tamping technique.
If you want to minimize additional purchases, the Barista Express Impress combines a quality espresso machine with a conical burr grinder. The newer “Impress” version adds technology that helps you achieve the perfect tamp pressure.
Key features:
- Built-in conical burr grinder
- Assisted tamping system
- PID temperature control
- Powerful steam wand
Potential drawbacks:
- Larger footprint
- If either the grinder or machine component fails, both are affected
According to Craft Coffee Spot, “The guided tamping system is a game-changer for beginners who struggle with consistency.”
Comparison Table: Key Features at a Glance
| Machine | Price | Built-in Grinder | Milk Frothing | Size (W×D×H) | Heat-up Time | Best Fo |
|---|---|---|---|---|---|---|
| Breville Bambino Plus | $499 | No | Automati | 7.7″ × 12.6″ × 12.2″ | 3 seconds | Those who want quality with automation |
| Gaggia Classic Pro | $499 | No | Manual | 9.5″ × 8″ × 14.2″ | 5 minutes | Long-term investment |
| De’Longhi Dedica | $339 | No | Manual | 6″ × 13″ × 12″ | 40 seconds | Small spaces |
| Flair Pro 2 | $339 | No | None | 12″ × 6″ × 10″ | N/A (manual) | earning fundamentals |
| Breville Barista Express Impress | $499 | Yes | Manual | 13.5″ × 12.5″ × 16″ | 30 seconds | All-in-one solution |
Do I Need a Separate Grinder with My Beginner Espresso Machine?
This question comes up constantly, and it’s an important one. The short answer is: yes, for most machines, you’ll need a separate grinder for best results.
Here’s why a grinder matters so much: Coffee beans start losing flavor within minutes of being ground. Pre-ground coffee will never produce excellent espresso because it’s already stale by the time you use it. Additionally, different espresso machines and beans require different grind sizes for optimal extraction.
Your options include:
1. Choose a Machine with a Built-in Grinder
The Breville Barista Express Impress on our list includes a quality burr grinder. This integrated approach saves counter space and simplifies your workflow.
2. Buy a Separate Espresso-Capable Grinder
If your machine doesn’t include a grinder, you’ll need to budget for one separately. For espresso, you need a grinder that can:
- Produce a fine, consistent grind
- Make small, precise adjustments
- Use burrs rather than blades
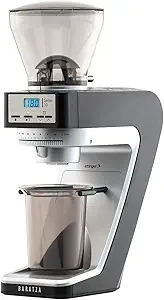
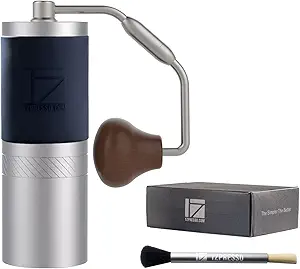
Recommended beginner grinders include:
Baratza Sette 30 ($249) – Entry-level dedicated espresso grinder
1Zpresso JX-Pro ($139) -Manual Coffee Grinder
Breville Smart Grinder Pro ($199) – Versatile electric grinder
3. Use Pre-Ground Temporarily (With Limitations)
If budget constraints prevent you from getting a quality grinder immediately, some machines (particularly those with pressurized portafilters) can work with pre-ground espresso. This is a compromise, but it’s better than abandoning your espresso journey altogether.
As coffee expert James Hoffmann puts it, “The grinder is arguably more important than the espresso machine itself.” It’s worth investing in a quality grinder, even if it means choosing a slightly less expensive machine.
How Much Counter Space Do Beginner Espresso Machines Typically Require?
For many of us (myself included), kitchen counter real estate is precious. Before bringing home your new espresso companion, you’ll want to understand the spatial requirements.
Typical dimensions for machines in this category range from:
- Width: 6-14 inches
- Depth: 8-13 inches
- Height: 10-16 inches
But that’s only part of the story. You also need to consider operational space:
Working Height Clearance
Most machines require you to fill a water reservoir from the top, so you’ll need clearance above the machine. I learned this the hard way when I had to pull my machine out from under my cabinets every time I needed to refill!
Allow at least 5-10 inches of clearance above your machine’s stated height.
Side Access
You’ll need space on at least one side to:
- Insert and remove the portafilter
- Access the steam wand
- Position your cup
Additional Equipment Space
Don’t forget to account for:
- Grinder (if separate): 5-7 inches wide
- Tamping station: 4-6 inches
- Knock box for used grounds: 4-6 inches
Space-Saving Tips
If you’re tight on space:
- Consider compact models like the De’Longhi Dedica
- Look for machines with front-access water tanks
- Consider a manual machine like the Flair, which can be stored when not in use
- Opt for an all-in-one solution like the Breville Barista Express to eliminate the need for a separate grinder
Insert image of a small kitchen setup with compact espresso machine here
What’s the Learning Curve for Using an Entry-Level Espresso Machine?
I won’t sugarcoat it—there is definitely a learning curve. But that’s part of the fun! Here’s what to expect as you begin your espresso journey:
The First Week: Foundation Skills (2-3 Hours)
During your first week, you’ll focus on:
- Understanding your machine’s basic operation
- Learning to tamp with consistent pressure
- Figuring out the right grind size for your machine
- Basic milk steaming (if applicable)
Expect some frustration and wasted coffee as you dial in. This is normal! I remember dumping several shots down the drain before getting one I actually wanted to drink.
The First Month: Refining Your Technique (10-15 Hours)
Over the first month, you’ll work on:
- Consistency in extraction time (ideally 25-30 seconds)
- Recognizing good crema
- Adjusting variables based on taste
- Basic milk texturing for lattes and cappuccinos
By the end of the first month, you should be making drinkable espresso most of the time.
Three Months In: Developing Expertise (Ongoing)
According to a survey by Tom’s Guide, 87% of home baristas reported feeling confident with their machines after 3 months of regular use.
- Making adjustments based on different beans
- Experimenting with temperature and pressure
- Developing latte art skills
- Troubleshooting problems with confidence
Learning Curve by Machine Type
Different machines present different learning challenges:
| Machine Type | Initial Learning Curve | Time to Competency | Best For |
|---|---|---|---|
| Super-automatic | Very low | 1-2 days | Convenience-focused users |
| Automatic | Low | 1-2 weeks | Results-oriented beginners |
| Semi-automatic | Moderate | 3-4 weeks | Enthusiastic learners |
| Manual | High | 1-2 months | Craft-focused beginners |
Accelerating the Learning Process
To flatten that learning curve:
- Watch tutorial videos specific to your machine
- Start with fresher, medium-roast beans (they’re more forgiving)
- Keep a coffee journal to track variables
- Join online communities for your specific machine
- Be patient with yourself!
Budget-Friendly Accessories to Enhance Your Espresso Experience
While the machine itself is the biggest investment, a few affordable accessories can dramatically improve your results:
Essential Accessories
- Tamper ($20-30): Even if your machine comes with a plastic tamper, upgrading to a weightier metal one improves consistency.
- Knock Box ($15-25): A dedicated container for spent coffee pucks makes cleanup much easier.
- Frothing Pitcher ($10-15): Get one sized appropriately for your typical drinks (12oz for single drinks, 20oz for multiple).
- Scale ($20-30): Weighing your coffee grounds and espresso output ensures consistency.
Nice-to-Have Additions
- Distribution Tool ($15-30): Helps evenly distribute grounds before tamping for more consistent extraction.
- Bottomless Portafilter ($30-40): Lets you see extraction in action to identify problems.
- Shot Glasses ($10-15): Makes it easier to judge volume and quality of extraction.
- Microfiber Cloths ($10): Keeps your machine clean and shiny.
Insert image of essential espresso accessories here
Maintenance Tips for Longevity
One advantage of machines in this price range is that they’re generally designed for home maintenance. With proper care, your espresso machine can provide years of reliable service:
Daily Maintenance
- Wipe the steam wand after each use
- Purge the group head briefly before and after pulling shots
- Empty the drip tray as needed
- Discard used pucks promptly to prevent mold
Weekly Maintenance
- Backflush with water (if your machine supports it)
- Clean the portafilter and basket thoroughly
- Wipe down external surfaces
- Check water reservoir for mineral buildup
Monthly Maintenance
- Descale according to manufacturer recommendations (especially important in hard water areas)
- Clean the shower screen
- Check gaskets for wear
According to Coffeeness, “The number one reason espresso machines in this price range fail prematurely is inadequate descaling.”
Common Beginner Problems (And How to Fix Them)
Even with a great machine, you’ll encounter some hiccups along the way. Here are solutions to the most common issues:
Problem: Espresso is coming out too fast and tastes sour
Solution: Grind finer, ensure you’re tamping with sufficient pressure, and check that you’re using enough coffee (typically 18-20g for a double shot).
Problem: Espresso is coming out too slowly or not at all
Solution: Grind coarser, check for channeling (uneven water flow through the puck), and ensure your machine is fully heated.
Problem: Milk isn’t frothing properly
Solution: Ensure your steam wand is clean, use cold milk, start with the wand just below the surface, and gradually lower the pitcher as volume increases.
Problem: Machine seems to have lost pressure over time
Solution: Check for scale buildup and perform a descaling cycle. If the problem persists, the pump may need professional service.
Problem: Coffee tastes burnt
Solution: Check your water temperature if adjustable, try a lighter roast, and ensure you’re not leaving the portafilter in the group head between shots.
The Joy of Learning: Embracing the Home Barista Journey
There’s something uniquely satisfying about mastering a new skill, especially one that enhances your daily ritual. As someone who’s been through this journey, I can tell you that the learning process itself becomes part of the pleasure.
Each morning becomes a mini opportunity for improvement. You’ll find yourself noticing subtle differences in extraction, celebrating your first perfect heart in latte art, and yes, occasionally cursing when everything goes wrong despite doing everything “right.”
That’s the beauty of espresso—it’s both science and art. Some days you’ll nail it, other days you won’t, but the pursuit keeps it interesting.
As James Hoffmann puts it, “Making great coffee at home should be a pleasure, not a chore.” With the right machine and mindset, it absolutely can be.
Conclusion: Your Espresso Journey Begins Here
Finding the best espresso machine under $500 for your needs isn’t about getting the most features or the most expensive model in range. It’s about finding the right balance of quality, convenience, and learning opportunity for your specific situation.
Whether you opt for the automation and consistency of the Breville Bambino Plus, the time-tested reliability of the Gaggia Classic Pro, or the space-saving design of the De’Longhi Dedica, you’re making an investment in elevating your daily coffee experience.
Remember that the machine is just one component in the espresso equation. Quality beans, a capable grinder, and—most importantly—your willingness to learn and experiment will ultimately determine the quality of your home espresso.
So which machine will become your morning companion? The answer depends on your priorities, space constraints, and how you envision your espresso journey unfolding. But I can promise you this: with any of the machines we’ve discussed, and a bit of patience, you’ll soon be pulling shots that make café visits optional rather than essential.
Ready to transform your kitchen into your new favorite coffee shop? Your journey to becoming a home barista starts with the perfect machine—and now you have all the information you need to make that choice with confidence.
Have a question about getting started with home espresso? Drop a comment below, and I’ll do my best to help!
[…] automatic espresso machines are designed with user experience in mind. Intuitive interfaces, pre-programmed recipes, and clear […]
[…] combined with expert knowledge, to help you understand what makes certain beans sing in your espresso machine. By the end, you’ll have the confidence to select beans that match your taste preferences and […]
CmiyG JGqd QBGbh zokMFTq qgADEke
[…] cheaper coffee makers that dump water in a single stream, Moccamaster’s shower head design evenly saturates all the […]
[…] might work fine for the average person, but it would never feel quite right for your specific body. Espresso machines with fixed settings are similar—they’re designed for an “average” coffee bean […]
[…] your first espresso machine is like selecting a musical instrument. It’s not just about the specs it’s about […]
[…] specifically for espresso workflow, the Lunar is compact enough to fit on an espresso machine drip tray while offering laboratory-grade […]
[…] Espresso Machine: The gold standard, providing the pressure needed for proper extraction and crema […]
[…] ready to embark on your home barista journey, Breville offers some of the most beginner-friendly espresso machines on the market. But with so many options, price points, and features, choosing your first machine can […]